Xspouse browser preview and printing
Topics
How to configure headers and footers
When you print an Xspouse report from your browser, Xspouse adds a header and footer to the report. In addition to the Xspouse header and footer, browsers may add an extra header and footer of their own, which you may not want (see the example below).
This topic explains how to change the settings in your browser to exclude, or modify, the extra browser header and footer. Chrome, Internet Explorer, and Firefox are used as examples.
Click on any of the following to expand the content.

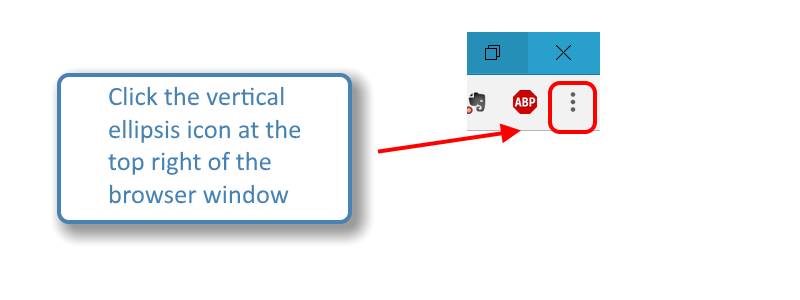
In Chrome, you can turn headers and footers on or off in print settings. To view the print settings, either hold down the Ctrl button and press 'p' or click on the vertical ellipsis at the top right of the browser window, as shown below:
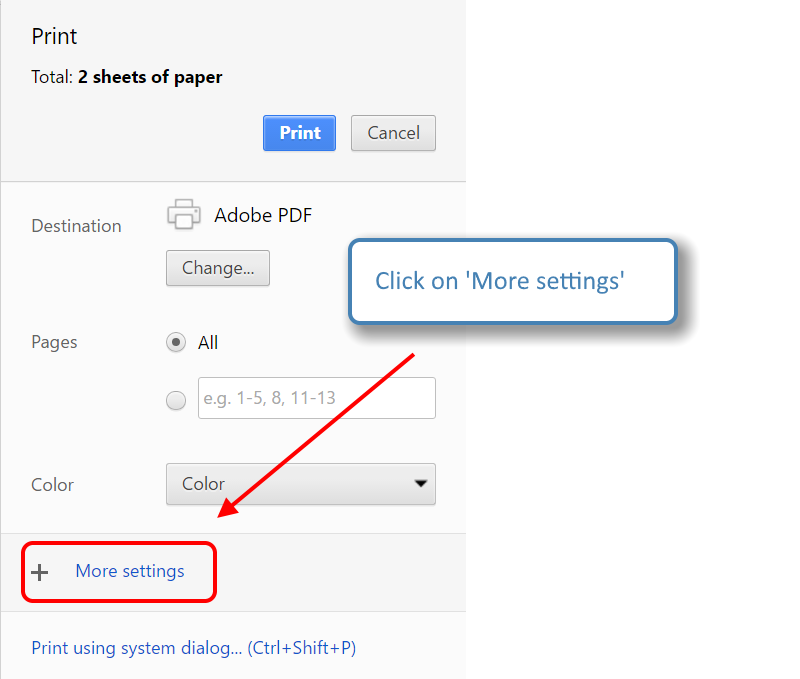
The print setup panel will appear on the left of the browser window. Click on 'More settings', as shown below:
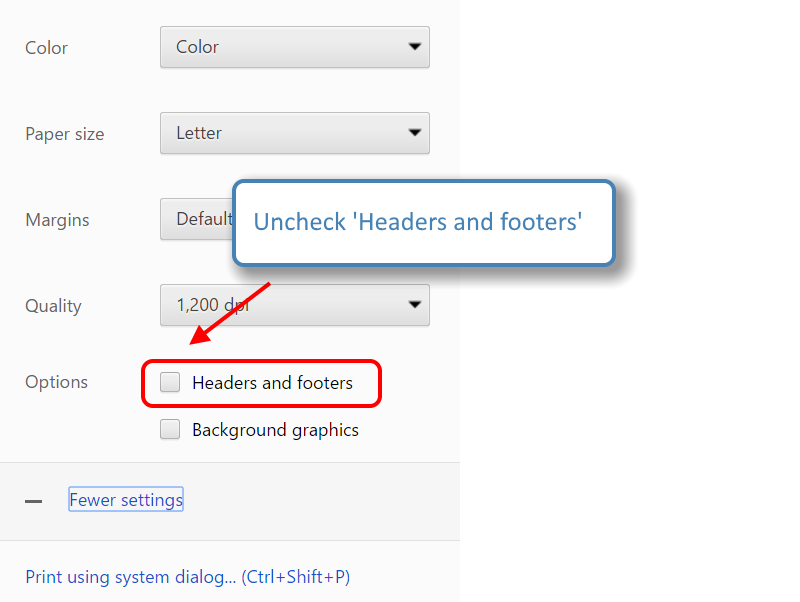
You can then turn headers and footers on or off by checking or unchecking 'Headers and footers'. For example, to turn off headers and footers, uncheck the box as shown below:
Your settings will remain in effect for all printing from Chrome (until you next change the settings).
Internet Explorer allows you to turn headers and footers on or off, and also allows you to configure the contents of headers and footers. Each of these is explained in this topic.
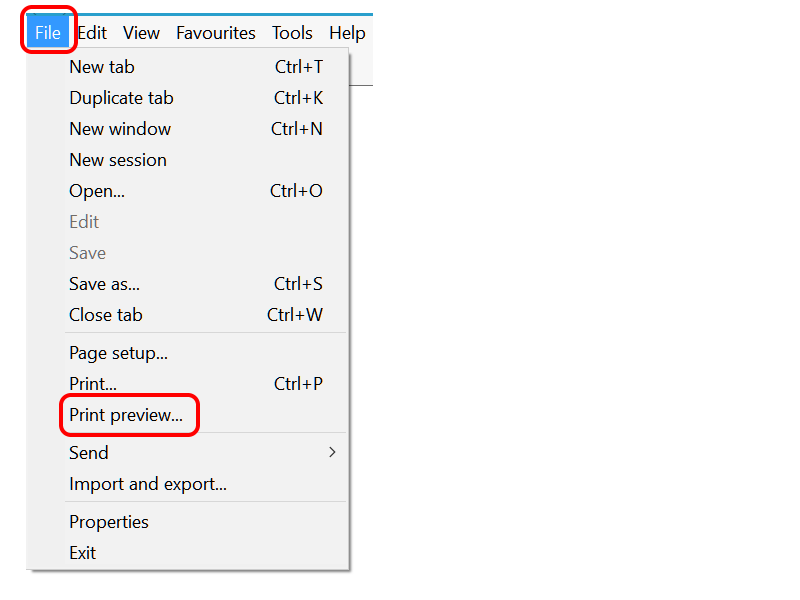
To turn headers and footers on or off just for this print only, click on 'Print preview...' in the 'File' menu, as shown below:
In the print preview window, click on the icon that toggles headers and footers on and off (you will see the headers and footers disappear/appear in response), as shown below:
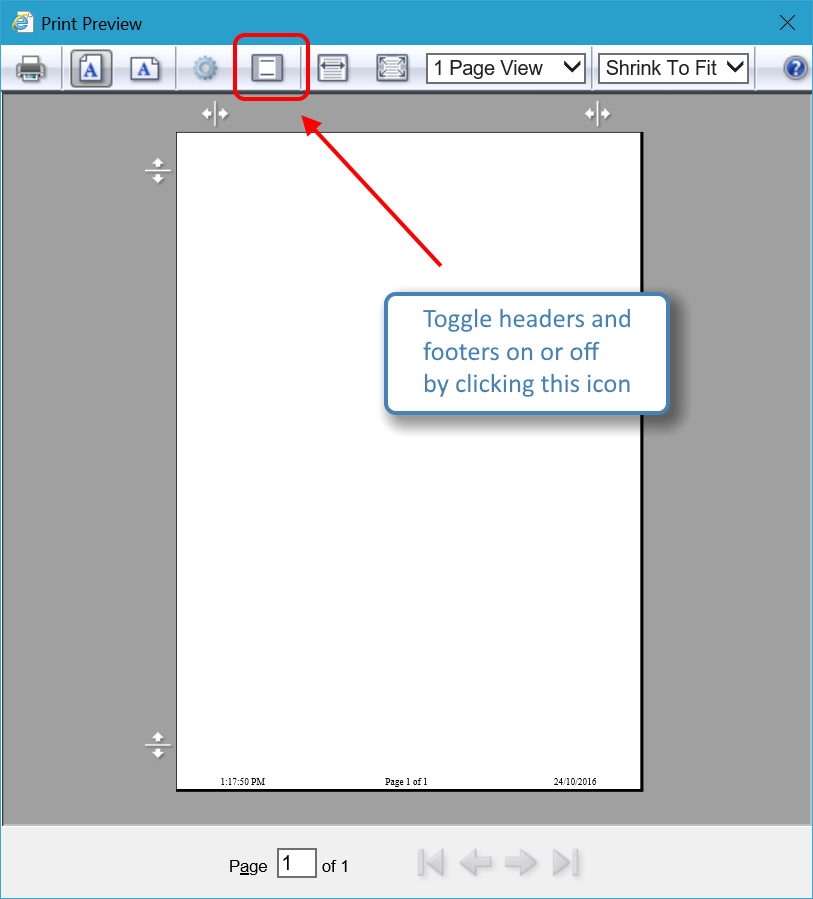
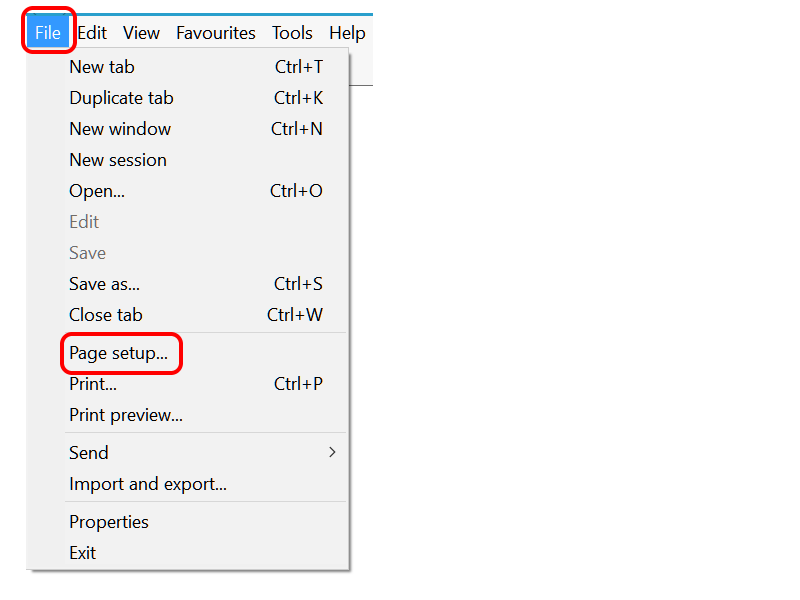
That will turn headers and footers on or off only for this particular print job. To either turn headers on or off for all print jobs, or to configure the content of headers and footers, click on 'Page setup...' on the 'File' menu, as shown below:
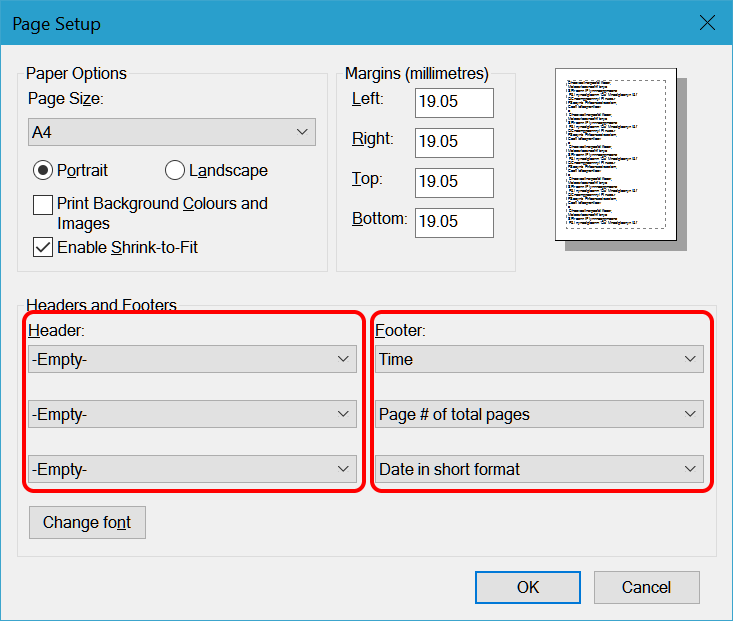
In the page setup panel, you can configure what appears in each section of headers and footers (headers and footers are each divided into three sections; left, middle, and right). To turn headers and footers off, set each section to '-Empty-'. In the following example, all sections of the header have been set to empty, and the footer has been configured to show time of print on the left, page count in the middle, and date on the right.
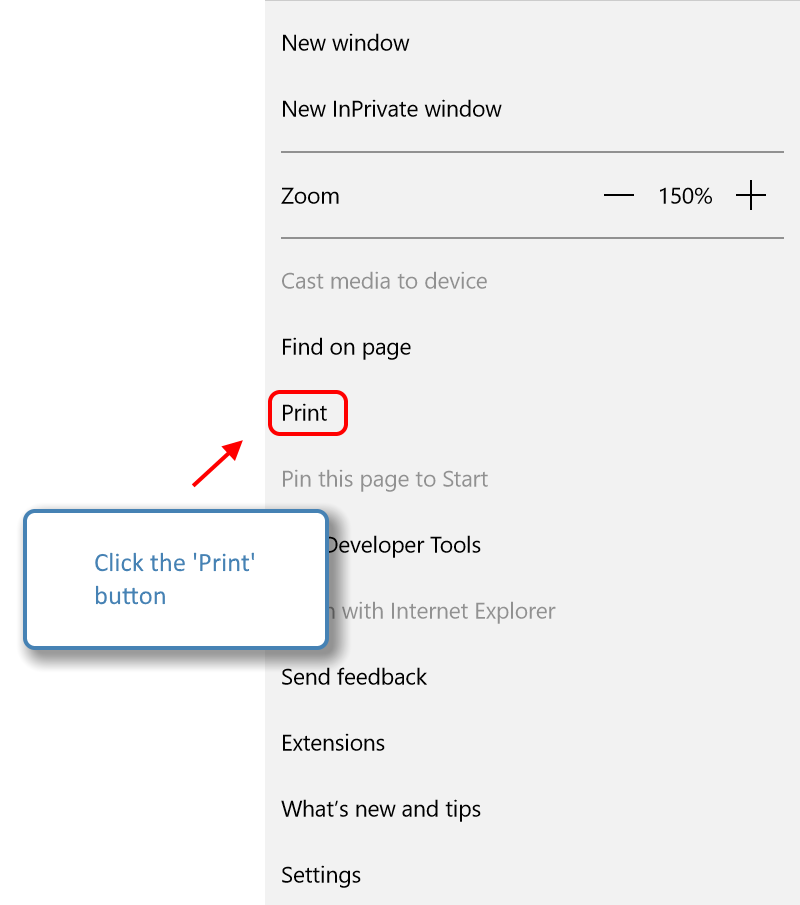
In Micrsoft Edge, you can turn headers and footers on and off in the 'Print' dialog. To open the 'Print' dialog, either hold the Ctrl button down and press 'P', or, alternatively, you can click the ellipsis icon at the top-right of the browser window, as shown below:

A drop-down menu will appear on the right of the browser window. Click on the print icon, as shown below:
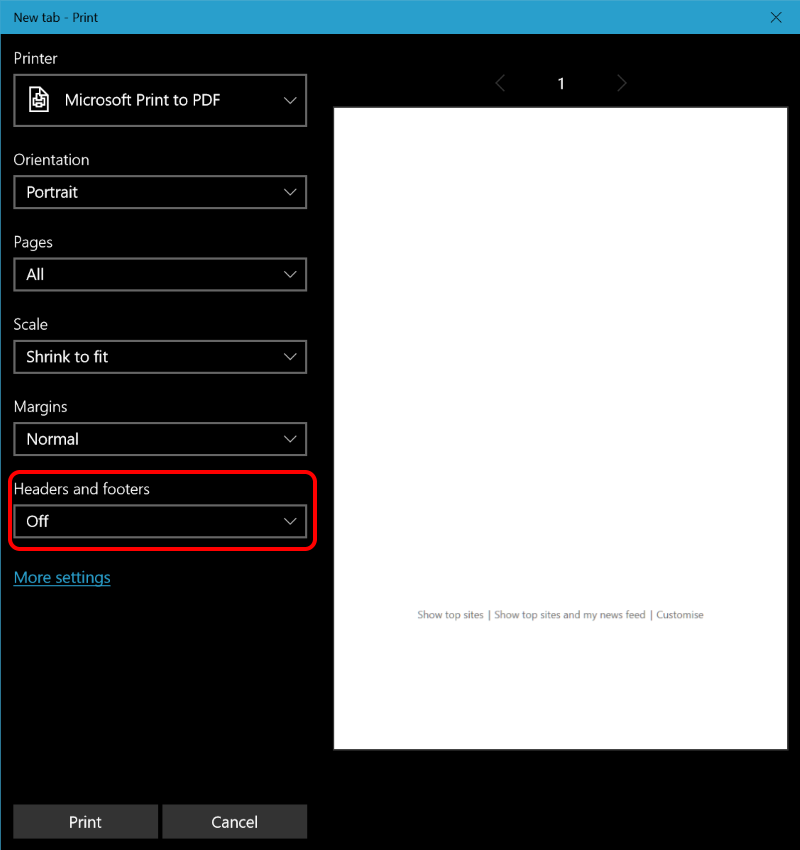
The 'Print' dialog will appear. In the 'Print' dialog, turn headers and footers on or off, as shown below:
 ]
]
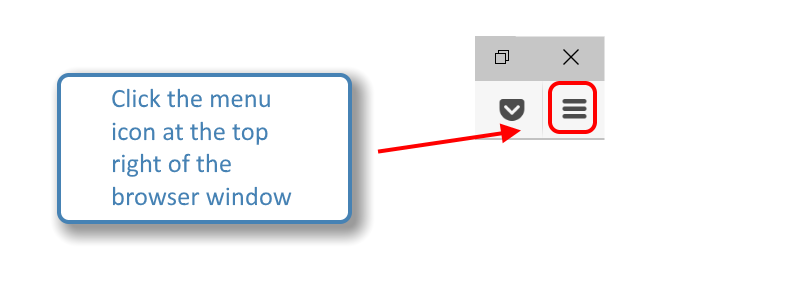
Firefox allows you to configure the contents of headers and footers, optionally setting the content to blank. To configure headers and footers, click the menu icon at the top-right of the browser window, as shown below:
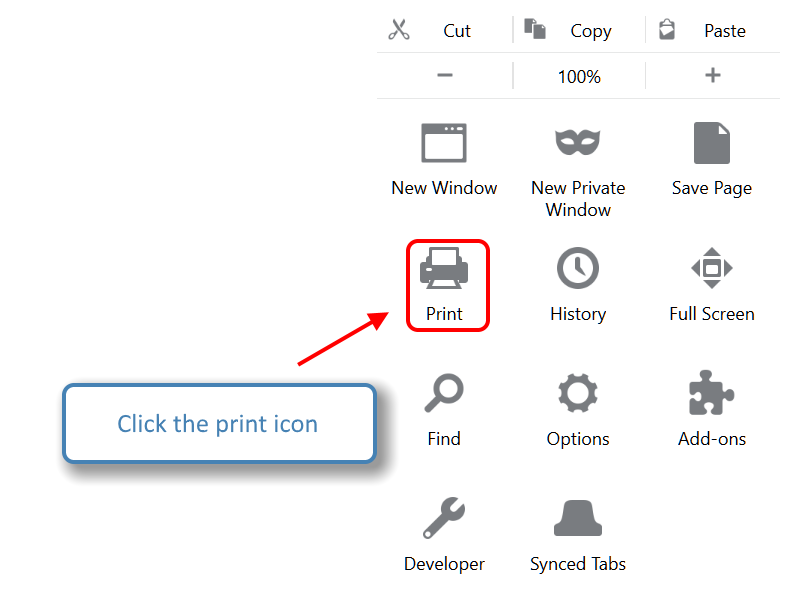
A drop-down menu will appear on the right of the browser window. Click on the print icon, as shown below:
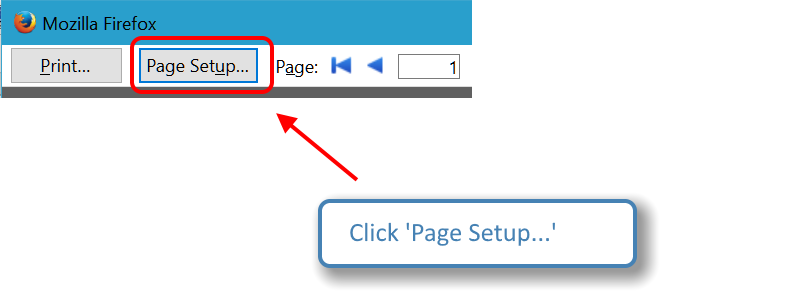
In the print preview window that appears, click on 'Page Setup...', as shown below:
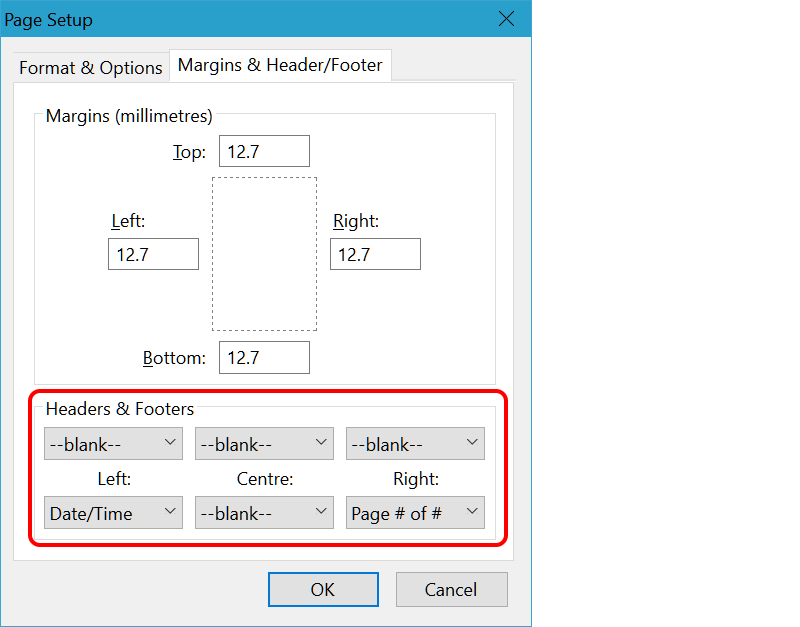
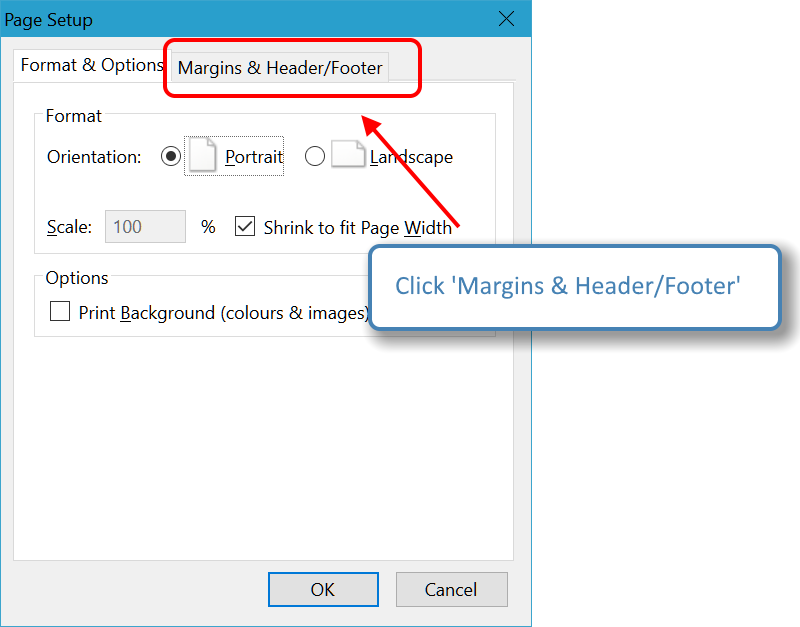
In the 'Page Setup' dialog that appears, click on the 'Margins & Headers/Footers' tab, as shown below:
In the 'Margins & Headers/Footers' tab, you can configure what appears in each section of headers and footers (headers and footers are each divided into three sections; left, middle, and right). To turn headers and footers off, set each section to '-blank-'. In the following example, all sections of the header have been set to blank, and the footer has been configured to show date/time of print on the left, blank in the middle, and page count on the right.